Showing posts with label Inspiration. Show all posts

Wednesday, February 20, 2013

Achieving a Clean Finished Look


When I am sewing I love to have clean lines and a fully finished look.  In order to get my clean finished look on this crocheted and embroidered apron bib I used a small zigzag along the crocheted edge.  

Here are the steps I used to achieve the final look.

I cut out both the fashion fabric (the embroidered pillowcase) and the lining (plain white).  The darts were marked and stitched and then the 2 layers were placed right sides together.  I stitched the underarm seams using the edge of the presser foot as my seam allowance, approximately 1/4".


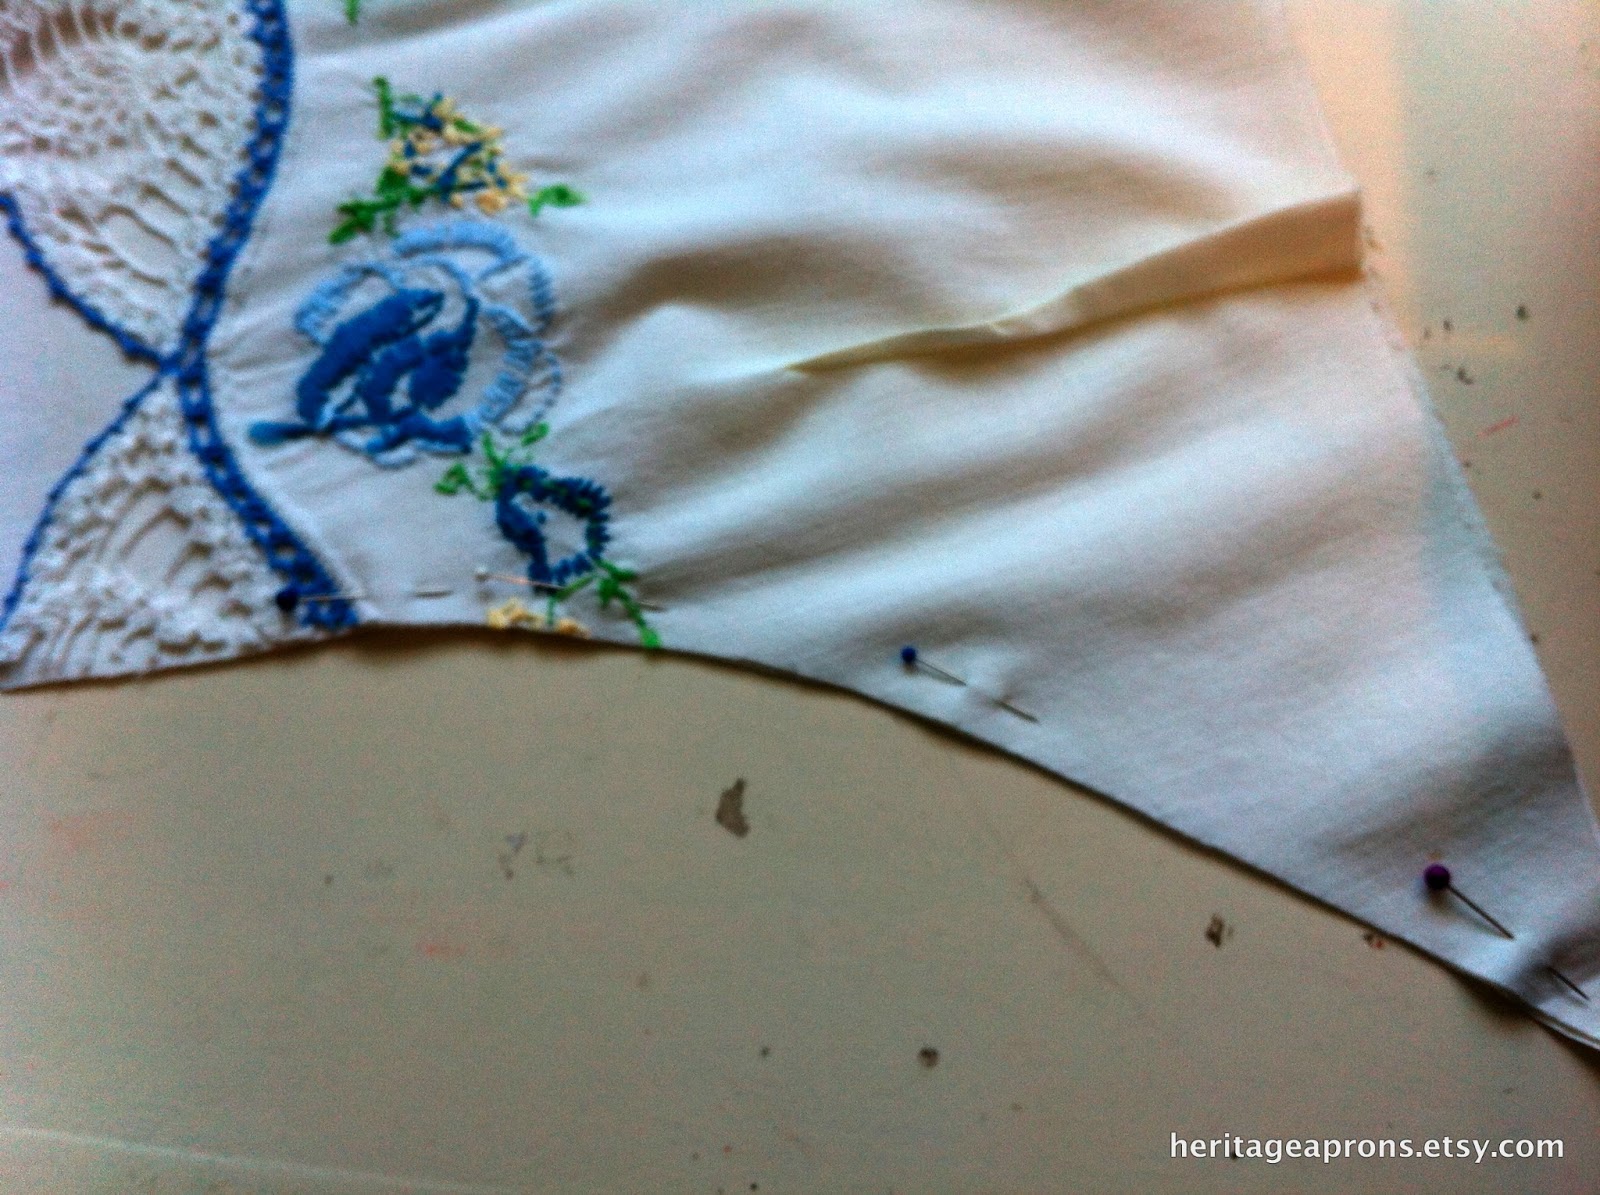
Next I turned the bib right side out and pressed the underarm seams.  I pinned the bib flat and used a short narrow zigzag to finish the top edge.  This is where the special edge finish starts to happen.  


Pictured here is the exact stitch length and width I used for the zigzag edge finish.


Once the full width of the bib top had been zigzagged I flipped the bib over to view the lining side.  The new stitching line followed the original stitching line of where the crocheted cotton had been attached to the pillowcase.  This is what the backside looked like.


 Now it is time to use my favorite pair of scissors.  They are a gingher bunt tip pocket scissor.  Excellent for using on the embroidered or crocheted linens I work with.  They will not catch or accidentally cut your embroidery!   I made my scissor purchase through Debra with Labours of Love Heirloom Sewing.  They are an online business that operates near Vancouver, BC,  Canada.  An worthy investment for the   the type of sewing I enjoy.  


These incredible scissors let you get in tight against your zigzag and not catch the crochet cotton.  I trimmed along the full front of the bib.


Once the selvage lining had been cut away you have a cleanly finished edge.  The lining side looks clean and crisp.  Your Front side looks clean and crisp. 


It is as easy and simple as that!  


Stay tuned for a post coming in the near future revealing the full Apron pictured here.  It was a custom ordered piece delivered to Saskatchewan, Canada.  


Thank you for sharing in my passions, 

Danine


Wednesday, November 21, 2012

Building Tips for your "Fort in a Bag"


Building a Fort is pure fun and a great way to encourage imagination.  This post is written especially for Adults needing to kick start their imagination and keep pace with those kids.  I have compiled a list of tips that will help you create a unique Fort every time.  My most important tip, remember to get down to the child’s eye level and experience the Fort from the inside.  This is where the memories will be made.  It will be an amazing encouragement to your child in preserving a Heritage.  A Heritage that will be remembered and passed from them to the next generation.  


Your Fort in a Bag comes with the basic tools you need to get started.  Additional furniture is an option but not required.  By using the Clothesline included you can get height for your Fort.  Tie the two ends to a piece of furniture, chair, curtain rod, or my favorite, a door hinge.  Of course you are the judge of where the kids can or cannot attach their Fort and what is a safe location. Score 1 for the Fort in a Bag!  Furniture usage is optional.   


Other items for your infrastructure could include couches, chairs, table (card), bunk beds, or Rubbermaid totes.
Choose a building spot that is not in a high traffic location.  I guarantee you will be much more open to having the Fort up for a few days, or weeks, if it is not in the middle of the Kitchen.


Add your included bed sheets to the Clothesline.  There are ribbons sewn to all 4 corners of your sheet.  It cannot slip away on you!  The simple straight and easy tent uses 1 of your sheets draped over the Clothesline and anchored to low lying furniture at all 4 corners using your ties. 


To increase the size of your Fort to a Fortress use one sheet per side.  Attach the sheet to your Clothesline with your included clothespins.  Remember to use your corner ties on the Clothesline for more strength and longevity.  Score 2 for the Fort in a Bag!  The sheets will not be continuously slipping away on you. 


Remember back to your days of building.  Books are great anchors and elastic bands will work to cover chairs with your sheets if you have run out of clothespins.  


Extra walls could probably be found in your Linen Closet.  However, chances are better that the Fort to last longer if you stay out of the Closet.  The sheets provided in this kit are especially for Fort building.  You will not be looking for these ones or having to rationalize with a 2 year old about dismantling his Fortress.  Score 3 and 4 for the Fort in a Bag! Your Linens stay in your Closet and there are no 2 year old meltdowns.

Consider creating an entrance and an exit for your Fort.  Once you get the little people and the Adult(s) in you may feel claustrophobic and be looking for a quick escape!  

Be sure to add a pillow and favorite Stuffies to the Fort.  It will make it a little more comfortable to sit on once you get in.
Bring snacks into the Fort if you plan to stay awhile.

Bring a few books into your newly built Fort.  Read a few stories and maybe inspire a non reader to become a reader.  Score 5 for the Fort in a Bag!  Your tent is helping to promote literacy.      


Create a special name for your Fort with your child.  Your Fort in a Bag comes with a temporary name until you can decide on a family one.  

Consider a flashlight as an additional gift with your Fort in a Bag.  This is now a bonus gift included with your Fort in a Bag purchased in 2013!  

Stay and share a few extra minutes with your child. Cherish the memories you have just created in your uniquely designed Fort.  Score 6 for the Fort in a Bag!  Your child has a new piece of Heritage they will remember and share with their children in the years to come.


Finally, your Fort in a Bag is Eco-Friendly.  The bed sheets chosen are always repurposed and many times they are vintage pieces. Score 7 for the Fort in a Bag! Thank you for considering my product.  You made the world a little greener today.  

Best of Luck on your Fort building Venture!  It will get easier each time you create, I promise.

Danine

Thursday, May 19, 2011

Mother's Day Kid's Class

Here is a class I offered a few times over the past 3 weeks leading up to Mother's Day.  A project that was set for Mother's Day but could really be used for any occasion or non-occasion.


I prepared a portion of the project and then the kids did a little painting, sanding, and gluing.   


Here is the room nicely organized before one of the classes started.


Here you can see the blocks were prepainted.  The kids then painted the letters.


I had a special request for MUM.


Painting started cleanly!  It took a long time for this particular set to dry!


My boys all attended one of the sessions.  Mommy chose the papers they would be using.  Yes I am a little controlling.  


The blocks were sanded an the edges a little to give that distressed look.


Then the papers were "glued" to the blocks with Mod Podge.  Straight to the block and then coated across the top.


A hot glue gun attached the letters onto the blocked once they were dry and sanded like the blocks.


The ribbon was tied around the full block and into a bow.  There was then a little extra length tied in a knot around the original bow.  I added a little hot glue to secure the bow from coming undone.  

If you are interested I have a few extra sets left over!  Kits are $12.00 and will come with pre painted blocks.  

Thanks for visiting, 

Danine

Sunday, March 6, 2011

An Easter Heirloom Apron


I am so excited to turn this tablecloth into an apron.  Just a few weeks ago my sister-in-law passed this piece onto me.  There is a lot of research that I am still needing to do with it.  I was given a bag of family linens and instructed  “not to just sell them.”  There is sentimental value to these treasures and once I looked in the bag I could understand why.  


Now I just need to do the research and find the stories that are attached to all the stains.  My pictures truly do not do it justice.  I opened up this square tablecloth with beautiful embroidery.  I am not sure if has been handmade by my mother-in-law or one of my husband’s grandmothers.  


The part that got me really excited after seeing the embroidered bouquet of flowers were all the stains!  There are bright pink ones, yellow ones, and blue ones.  At very first glance there was a randomness to the stains but then when I really paid attention there was a perfect pattern and explanation.  How many children were sitting around the table dying easter eggs when these splashes landed on the tablecloth?   


I can see where the bowls where sitting and what color had been in each bowl.  My heart starts beating faster when I see the linen and have so many questions.  How far back did the family dye easter eggs.  It is a tradition we do at out house.  I have decorated eggs at my husbands house for the the 15 years we have been together.  Are these stains from when he was a little boy or are they from his mom having decorated eggs when she was a young girl?  

The apron has yet to be created but there will be one out of this tablecloth.  It will be a piece that stays in the family.  
Do you have family traditions that can be traced by vintage linens?  I would love to hear your stories.  
Danine


Saturday, March 5, 2011

Butterfly Beauty


This beautiful piece was a treasure my Auntie Ann found at a little antique shop in Ontario.  She told me that she found a wooden chest and opened it to explore.  It was filled with treasures.  That is if you are an apronologist I guess.  I certainly consider opening a chest of vintage aprons a successful treasure hunt.  

The piece is hand embroidered with the backside as neat and tidy looking as the front.  

For right now this piece is sitting on the sidelines waiting to be recreated.  The complete inspiration has not come out yet.  I will let the piece sit out in view for a while and one day the inspiration will come.  


This is the process I go through with nearly all my designs.  I find an antique linen I love and let it sit out where I can see it everyday.  It may sit there for months on its own or I may pair it with a piece of fabric that seems to match.  Then I will be in an antique market one day see a jar of vintage  buttons and the full vision of the finished apron will hit me.  It is then that I race home and can not wait for the boy’s bedtime so I can create the vision in my head.  These are late nights but the result in the morning is breathtaking, to me anyways.  
How do you get your inspirations?
Danine  

Friday, March 4, 2011

A Farmer’s Wife Apron


I would truly love to know the stories behind some of the pieces I collect.  This beautiful apron was found at an antique market and fell in love.  It is so simple and yet would have so many stories to share.  I can tell that it has been homemade and I envision a farmer’s wife to have worn it.  I see her out in the yard pinning up laundry to the line with pins coming from her pockets.  I see kids playing on the grass and pulling on the hemline.  I can also smell the fresh apple pie that she made this morning and just took out of the oven.  

The pink details are bias tape while all the other edges are finished with a double folded hem. 

This is the apron I have been choosing to wearing in my kitchen over the past 6 months.    
Thanks for visiting, 

Danine